Canning for the First Time – What I Wish I’d had.

Today was my first time canning. I’m going to share with you what I wish I had for this adventure.

The Decision to Can

I made pepper jelly and canned it today. I have never canned anything in my life, nor have I ever made jelly! Dehydrating – yes, but canning – no! Christmas is upon us though, and nothing feels better to give than something you made yourself. To say I was unprepared would be an understatement, ha. I’m going to share my experience, and then share somethings that I wish I had had to make my first time canning easier.

This whole jelly project started with a game our family plays for Christmas, and we always play a round where the gifts up for grabs are homemade.  I’ve always wanted to can, but never really had a reason. Also,  I really don’t know too much about it.  The family likes pepper jelly with cream cheese and crackers though, so I thought “Heck, let’s go all-in!”

I picked up a box of Mrs.Wages pepper jelly kit, which seemed like the easiest route to introduce myself to canning.

Picking Up Ingredients

At my local grocery store, I picked up 8 green bell peppers and 2 beautiful, red bell peppers. I figured I had everything else at home. Fast forward to this morning, I wake up, super pumped to make this jelly. I start chopping the peppers and throw them in my food processor (which I had luckily just received or I’m not sure what I would’ve done, ha.) Everything is going well until I need to strain the juice from the pepper puree. Cheesecloth is not something I have at home, and paper towels would soak up too much of the juice. Kory saved the day with a bandana and I was able to get my 5 cups of juice! Cheesecloth is definitely something I will be keeping on hand from now on.

Now I’m at the part where I am supposed to be adding the lemon juice, vinegar, and packets from the Mrs.Wages kit. Vinegar…where is my vinegar?! I could’ve sworn I had some, after looking high and low I was clearly out. So, another run to the grocery store. I pick up beef sticks while I’m there, to make sure I have the strength to get through this.

I’m Actually Canning

Finally, I can really get started. I add my pepper juice, lemon juice, vinegar and the jelly packets to the saucepan and mix. Then I need to warm up my jars, so I make a small water bath in my largest stockpot. While my stockpot did work for this, a canner would be a better fit. Because a canner can hold more water and come with a jar rack. Jar racks are for keeping the jars off the bottom of the pot where the most direct heat is.  Keep jars away from direct heat so they don’t accidentally shatter from getting too hot.


I get my first 5 jars (my stockpot only held 5 half-pints at a time) into the hot water with my trusty tongs and boil for five minutes. Using tongs was definitely tricky and I was wishing I had a jar lifter. Jar lifters are created to get jars in and out of hot water safely. Using tongs is something I will NEVER do again, and I’m sure my hands will thank me.


Success

I was pleasantly surprised that after all of this, my lids SEALED! As a result, I successfully canned my first batch of anything. As I am sharing my ordeal with you, my first batch of pepper jelly is coming to room temperature and 24 hours from now should be ready to eat. I am officially a canner.

I hope you laughed a little with me and enjoyed these tips I wish I had known. Please make sure to come back for future canning adventures with me!

Four Ways to Brew a Cup of Coffee While Camping

The Magic of a Cup of Coffee

Nothing is better in the chill of the early morning on a camping trip than the sweet, sweet taste of a cup of coffee. This year I tried out a few different ways of making coffee. Today let’s dive into four ways to brew a cup of joe on the trail and go over their pros and cons.

Instant Coffee

Starting off with an old standby, instant coffee is the most basic way to create a hot cup of happiness.

Pros:

  • Lightweight. This is the lightest option when it comes to brewing coffee in the woods.
  • Secondly, nothing extra is needed to brew instant coffee! The packet, the stove to boil water and coffee cup already packed is everything needed to enjoy a warm cup.
  • Thirdly, the price point is a huge win. Instant coffee can be found anywhere from 10 cents to one dollar per cup. A fraction of what your coffee shop addiction costs.
  • Finally, taste. While a lot of common instant brands really lack in flavor, there are new flavors and brands coming out all the time. Currently, you can find instant coffees that even have the creamer mixed in, saving you weight again.


Cons:

Although there are quite a few pros when it comes to instant coffee, there are drawbacks as well.

  • The main con with instant coffee is packing out the packets it comes in. Keeping track of those tiny packets can be difficult, but is very important when practicing leave no trace.
  • In contrast, while the taste is a pro it can certainly be a con as well. You need to try out a few brands to find one that suits your pallet, otherwise, you may end up with a chalky cup of coffee you need to choke down instead of enjoying.


Portable Kcup Brewer

Ohuhu makes the pour-over, manual kcup brewer that I use. This particular brewing system came with two reusable kcup pods which are fantastic for reducing waste!

Pros:

  • First off, the price is the real winner with this one. It is a one time purchase for the setup and under $20. Another great thing with the price aspect is that since the kcups included are reusable, you can buy bulk grounds of your favorite coffee and divvy it out among trips and home.
  • Secondly, reusable kcups are awesome! This system comes with two, so you can have one ready to go while brewing the other. It also significantly cuts down on waste, since you aren’t collecting a bunch of plastic kcups to carry out with you. Having the grounds in the kcups makes them easier to pack out as well.
  • Taste is also a huge winner with this system. Since you can fill the reusable kcups with the coffee of your choice, you really can’t go wrong here with the flavor – since it can be your absolute favorite coffee.


Cons:

While this system focuses on flavor and reducing waste, it comes with a con of its own:

  • This system is not multi-purpose, so it adds extra weight to your pack. It can be hard to find room to add a gadget that takes up important space for water bottles and cook kits.

Portable Coffee Grinder and Pour Over

This coffee system by Meetwin is a great option that packs a ton of flavor!

Pros:

  • First of all, this system has a built-in grinder for the freshest coffee you can experience on the trail.
  • Because it has a built-in grinder, you can buy your favorite beans in bulk the best tasting cup of coffee.
  • Price also becomes a factor when you look at buying in bulk. It will also save you money since you can use your beans both at home and on the trail.


With this one there are a few more cons to weigh out.

Cons:

  • This coffee system, while portable is heavy. All the components including the built-in grinder bring this system to a little over a pound.
  • Secondly, this is not a multipurpose system so it takes up valuable room in your pack.
  • Finally, carrying out waste is a little trickier with this system, because you grind the beans into the pour-over cup and they get compacted by the water.


GSI Java Press

The last option we will be discussing is this nifty multipurpose system from GSI.

Pros:

  • Ease of use is definitely a huge win for this system, essentially it is a french press. Pour the coffee grounds in the main bottle, hot water goes over the grounds, then place the screen back in the bottle and press down.
  • Again, since it is coffee grounds, find your favorite and buy in bulk. This makes for a delicious cup of coffee every time.
  • Thirdly, it is easy to get the grounds out of the bottle so you can practice leave no trace and carry out with ease.
  • Finally, the best part of the GSI java press system is that it is multi-purpose. While it makes a wonderful cup of coffee, you can use it as a good old water bottle thanks to the sealable lid. This helps justify bringing a coffee gadget and the room it takes up in your pack.


While this is a wonderful option space and taste-wise, it too has its cons.

Cons:

  • The price point on this system could definitely be a con to some, coming in at around $20.
  • You need to be quick at drinking your coffee. Since this system is a french press and the coffee stays in the bottle, it continues to brew until you are done drinking it. This can cause the coffee to become a little bitter or overpowering if not consumed fast enough.


Which System Makes the Best Cup of Coffee?

All four of these systems are great and have their place in the camping world. The portable coffee grinder is great for groups, to really treat your friends to a specialized cup of coffee. While the portable kcup is great for when you are looking for special flavors to entertain your pallet. I usually go back and forth between good old instant (hey, it’s easy!) and the GSI Java Press. The Java press is definitely my go-to, the weight is easily justified with it being a multipurpose system and you really can’t beat the flavor it creates.

Let me know in the comments down below if you crave that deliciously warm cup of coffee during the chill of the perfect morning? There’s just something about that cup of coffee that makes the morning magic after the perfect night’s sleep while camping. And if you are a coffee junkie like me – how do you make your perfect cup on the trail?

canister stove for camping

Canister Stoves for Camping

Food is always on my mind when prepping for camping. The minute I start planning a trip, it’s usually “mmm, what are we going to eat?!” With food being such a big part of the experience making sure you are able to make it is pretty important! My favorite way to cook our food while camping, second only to fire, is a canister stove.

Canister stove for camping

Stoves for Camping.

Sure, there are many types of stoves: alcohol, canister, solid fuel, woodburning and even solar-powered. Each fuel type has its pros and cons, which is a lot to unpack and we will save that for another day! Today, we are going to dive into canister stoves, and what makes them a great choice for your outdoor kitchen!

Space Saver

Canister stoves can be packed inside things already packed, such as a pot! This means you don’t have to find the room for a cooking container and a stove. A built-in perk to this (as if having more room in your pack wasn’t enough!) is that when prepping for a meal, just pull out the pot and the portable kitchen is ready to go!

Weight

We all know that space and weight are two things that are highly treasured when it comes to your pack! Canister stoves along with their space-saving convenience, are lightweight! A great stove when weight is a big concern is the BRS 3000T! This tiny stove heats quickly. The BRS 3000T is small, light, and also has three pot support legs with teeth that do a great job stabilizing pots.

Convenience

Honestly, this is the category that makes the canister stove a real winner for me. Canister stoves are so easy to use! All that is needed is the stove and the fuel canister. A great starter stove is definitely the Etekcity, this stove even has a piezo ignition so you don’t HAVE to carry a lighter (even though it’s always good to have one on hand!) Another perk to drop in the convenience category is that when it is raining, you can actually put this stove inside your vestibule. Ensuring a nice warm meal in the wet and chilly rain.

Cons

Everything has a con to balance out the pros, and the canister stove is no exception. There are three major cons that come along with canister stoves:

  • There can be issues with stabilizing the pot/pan that you are cooking with.  The pot/pan can make it unstable depending on what size they are and the weight that added to the pot/pan. Generally, pots are easier to stabilize on this stove type. Issues can be avoided by knowing beforehand what will be prepared on the stove, finding a flat spot to place the stove, and above all paying attention.
  • One downside to a canister stove is that the canister is a set amount. The amount cannot be adjusted for longer trips, to compensate you will need to bring another canister. Which takes away from the space-saving advantage.
  • Canister stoves can also be finicky when the temps drop below freezing. This fuel type is not ideal when winter camping, as it is not reliable to give flames. Winter camping is when reliability is non-negotiable.


Canister Stoves are a Great Choice for Camping

While canister stoves have their cons: stability, set amount of fuel and not being ideal for winter the pros balance these out. You can also compensate these cons by planning your trip so you are prepared with the right amount of fuel, know what the temp will be and having the right pot or pan for the job!  The overall size and weight, and above all convenience of a canister stove cannot be beat!

canister stove for camping

Make sure to share stories of using your canister stove, as well as recipes down below!


Ready to GO! What Should You Keep in Your Pack?

Sometimes, you catch the feeling of adventure on a whim. What should you keep in your pack, ready to go for such an occasion? That is what we are going to break down today.

I preach planning your camping adventures often, and about a month in advance. I talk about planning how long it will take to get to your destination, what activities you want to do, which campsite will be home for the weekend. However, there are moments where you just want to go with the flow, live life to the fullest and go on an unplanned adventure. Even while being spontaneous, a little bit of planning can definitely help make your adventure a fun one that goes smoothly. This is a hack for us that we use, mainly in the summer so that when the mood strikes we just have a few things to add to our pack and off we go. So…

Keep These in Your Pack to be Ready to Go


Make Sure to Store These Out of Your Pack

  • Sleeping bag, storing it compressed will ruin the loft
  • what should you keep in your pack Sleeping pad (I prefer self-inflating pads, and these should be stored expanded and not compressed.)
  • what should you keep in your pack Food, it just helps you keep an eye on expiration dates to store elsewhere. And if there happens to be a hole in the packaging you won’t get any ants crawling into your pack for a snack.
  • Knives, knives require maintenance and leaving them in your pack is an easy way to forget about them. Your knife is an important tool so making sure it is taken care of decreases the risk of it breaking or being damaged. It also allows you to change it up.
  • Flashlight or headlamp. This seems like a great idea, but you need to keep the batteries charged. Neither of these will do you any good if you get to camp and the batteries are dead.
  • Sunblock or Bug Spray, just in case they break open. You don’t want that stuff all over your pack.


There you have it! Storing these items in your pack will make it so you can throw in a few extras and spend more time enjoying your adventure! Make sure you check out our other camping lists here to make sure you grab everything you need. Let me know in the comment section below what you always make sure to have packed!

Convincing Your Loved Ones You’re Safe While Solo Hiking

Convincing Your Loved Ones You’re Safe While Solo

So, you wanna go into the woods by yourself? This can be so exciting, yet nerve-wracking! One of the most difficult parts is convincing your loved ones that you’re safe while solo. Well, how exactly do you do this? I have some tips for you below!

Educate Your Loved Ones

Part of the reason people are scared when their loved ones go off into the woods alone is that they are just uneducated about the matter. It’s easy to be scared of something you don’t know when A) you’ve never done it and B) all you hear about are murders on the Appalachian Trail and cougar or bear attacks. How do you combat this part of human nature, where the worst case scenario is all they can think of? Sit down and have a conversation with them! It helps to know statistics of the area you’ll be hiking in for the wildlife encounters, as well as some general safety statistics. This way you’ll be able to back up what your thoughts with facts and put their mind to ease. They will also appreciate the time you took to have a mature conversation about it and trying to calm their fear.

Here are just a couple of facts to get you started on your research:

Bear attacks kill on average 3 people per year in the United States, whereas transportation accidents cause 48,441 (circa 2017)

Mountain Lion attacks average 6 per year, with less than 1 fatality as a result (circa

Build An Itinerary

After you sit down and have a conversation go over many aspects of your trip, your next step should be to create an itinerary! Planning and getting a good layout for our solo adventure is going to make you more confident AND show your loved ones how prepared you really are. This guide will help your loved ones keep tabs on you, as long as you check in on a regular basis to let them know if you are keeping to schedule or falling behind. This works great when paired with a satellite messenger (see below), so you can communicate even when out of cellphone coverage.

GPS and Satellite Messaging

A really great tool that you can use to ease the mind of your loved ones is Satellite Messengers. These don’t need cell service, so you’re able to send an “I’m okay” message at the end of the day. This can really comfort your loved ones at home. Especially if you are on a more intense hike, like the Appalachian Trail, or a week-long trip up north where there is no service. These tend to be a little spendy, the Garmin InReach and InReach Mini are great options. Depending on budget and how often you will go on these excursions, renting may be a more affordable option try here and here.

Invite Them On A Trip

Now, you don’t need to invite them on the solo trip that you have been planning (although, you can if you’d like). The fear that your loved one is having could be that they have never gone camping or hiking. What is a better way to teach them, then to plan a trip and show them just what camping and hiking are all about! Not to mention, you get some great quality time with your loved one in nature and enjoy a favorite past time of yours.

Convincing Loved Ones You’ll Be Safe

When you get down to it making sure your loved ones know you are safe consists of educating them and having great communication. When your loved ones know what to expect and that you know what you are doing, they will worry less and you will get to enjoy yourself on your adventure! If you have any tips make sure to comment them below!

Safety Items

Safety in the woods can mean a lot of different things from dealing with animals, humans and just emergency scenarios. Below are a few things that help keep you safe in various scenarios. Again, the number one thing is to have an itinerary that you can follow closely and communication with loved ones so they know when something is off and can get you help right away.

Bear Spray – convincing your loved ones you're safe while solo hiking

Garmin InReach Mini –  convincing your loved ones you're safe while solo hiking

First Aid Kit  – convincing your loved ones you're safe while solo hiking

Ursack – convincing your loved ones you're safe while solo hiking


Dehydrating Ground Beef – Easy and Cheap!

Dehydrating ground beef is a super easy way to save money when you are an avid hiker or camper. Because let’s face it getting freeze-dried meals and meat for every outdoor endeavor can get pretty pricey. Your wallet can breathe today though because I’m going to share my recipe for dehydrated ground beef with you today.

Dehydrating my own ground beef was something that I always put off because I thought it would be so time-consuming. Turns out, it’s really not. When making a meal with ground beef, just cook up an extra pound or two that you can put to the side to dehydrate, and boom! the hardest part is over. The recipe below is for one pound, just double for two pounds. Check out the video here!

Dehydrated Ground Beef

Ingredients

  • 1 lb lean ground beef (you should look to 90% or higher because the fat will cause faster spoilage.)
  • 1/2 cup bread crumbs

That’s it!

Directions

  1. In a bowl, mix together your bread crumbs and hamburger. The breadcrumbs are going to help keep your meat soft once it rehydrates, so it’s not hard like gravel. I like to use plain bread crumbs because I never know what I will be adding my hamburger too, so I don’t want it preseasoned. You can definitely add Italian breadcrumbs if you like though. Mix together really well so you can’t see the breadcrumbs.
  2. Add your hamburger mix to a hot skillet and cook like normal. Make sure it is cooked all the way through.
  3. Drain the fat off the hamburger. Again, fat will go rancid first, so the less fat the longer your beef will last.
  4. Put hamburger in a colander and rinse with hot water, just to be sure you got as much fat as you could.
  5. Pat the hamburger dry with a paper towel and get out as much water as you can.
  6. Line your dehydrator trays with parchment paper, this way you won’t have hamburger falling out into the bottom of the dehydrator.
  7. Set your dehydrator to 165 degrees. It takes about 8-10 hours to dehydrate, but I always check on it at around 6 hours.
  8. Once it is hard and crumbly, it’s done!

This is super easy and will last for a few months stored in a ziplock bag. Rehydrate and enjoy in tacos, chili or whatever else you can come up with! Make sure to check out other camp cooking here!

Glacial Lakes State Park in Minnesota

Glacial Lakes State Park

Arriving

Two weeks ago we loaded up the jeep and headed to Starbuck, Minnesota. We were prepared for a camping experience a little out of our element. For the reason that Glacial Lakes State Park is a magical place where Minnesota prairie lands  (only 1/10 of 1% of the original prairie remains) and the central hardwood forest meet. Also, Glacial Lakes State Park is located in the Leaf Mountains.

Hiking In

In order to get to the hike-in sites, you will park at the horse camp. Along the edge is a large map showing all four sites, we chose Kettle. The park has 16 miles of hiking trails, it is about 2 miles to hike to Kettle Lake.  The park is very hilly and being prairie there is no shade, making it more difficult than your normal 2-mile hike. While mosquitos and biting flies were not bad, the ticks were awful, we had to stop along the way to pick some ticks off ourselves and the pupper.  Along the trail prairie dogs, ducks, geese, Great Egrets, and even a garter snake greeted us. Coyote scat was along the trail, and they are known for being in the area. However, we had no sightings of them.

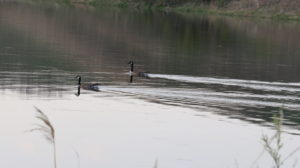
Geese at Glacial Lakes State Park

Kettle Lake Campsite

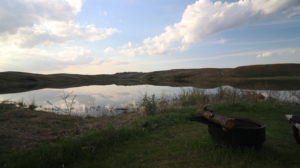
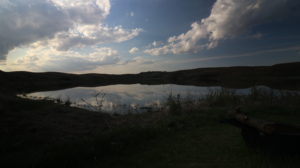
Upon arriving at the campsite you will note a small, newer portapotty close by and that the campsite is pretty open to the trail. This could cause some privacy issues, but this is a quiet park and we did not experience that. In fact, we did not encounter anyone else along the trail. Further, the campsite is nestled along the bottom of hills along Kettle Lake. This creates a beautiful, serene view from your chair or tent. While enjoying the beauty of the lake, you will see many of Kettle Lake’s residents. This includes a busy muskrat who spends all day swimming back and forth, geese, ducks, pelicans, and more Great Egrets.

Kettle Lake At Glacial Lakes State Park


Enjoying Camp

Turkey Dinner Mountain House was our very filling and delicious supper. You have the choice of ordering wood delivered to your campsite, but since this is a prairie we just used our canister stove for all meal preparation. Kory got to try out his new water filtration set up, and we used Kettle Lake as our source of water instead of hiking in the extra weight. We enjoyed playing with our dog, each other’s company, and just the beauty of nature before heading off to dreamy slumberland. Mid-May is still fairly cold at night, temperatures were around 40 degrees. We woke up early with the help of our dog, Mora, made a quick breakfast and broke down camp.

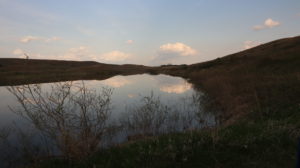
Kettle Lake
Kettle Lake
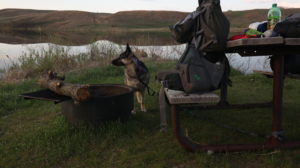
Mora at Kettle Lake
Mora at Kettle Lake

Heading Home

The hike back to the jeep seemed a lot quicker than the hike in. Many waterfowl still made their appearance in the morning, and the ticks were not quite as bad. We found the temperature was great for hiking out, around 60 degrees, the sun was bright and we were gifted a few small breezes to help keep us cool. Leaving the park was as easy as coming in.  Once we were home we combed through ourselves and Mora and found quite a few more ticks.

Final Thoughts

Glacial Lakes State Park is a beautiful and unique park. Lakes fill this magical crossroads of prairie and hardwood forest. Trails in this park are moderate because of how hilly they are. You will find entertaining wildlife at camp and along the trail. We will definitely visit Glacial Lakes State Park again, truly the only downside was the plethora of ticks (so make sure you have your bug protection like permethrin.) Overall this park is a 4 out of 5 from us!


How to Start a Food Stockpile

So You Want to Start a Food Stockpile?

How to start a food stockpile has been a big question lately. With the weather doing crazy things it has people thinking about “doomsday” and how they can better prepare themselves. One of the best ways to prepare for a situation like that is to be ready to hunker down, this includes having a good stockpile of food. A good stockpile of food doesn’t just mean having a large quantity of food (even though that is part of it.) Having a good stockpile means having food that you eat on a normal basis, is delicious raising morale when it’s low, and foods that are easy to prepare.

Building a Stockpile

Where to start:

When starting a food stockpile it will take some time and preparation. The first place to look when you start a food stockpile is your very own pantry. Looking in your pantry can help you see what food is part of your diet in everyday life. This way of stocking up has three huge benefits:

  1. Having things you eat regularly helps you rotate through your stockpile so that nothing spoils. This prevents you from wasting food AND money!
  2. It is easy to prepare these items as you are familiar with them and use them on a semi-regular basis. For example, if you have rice kept on hand, chances are you have multiple recipes where rice is an ingredient. This saves time because you know how to prepare it and gives you a little variety as you are able to swap out recipes.
  3. It builds morale! Food often carries a sense of nostalgia and good memories for us. Having food that is associated with good times just gives an extra boost of positivity on days when it is really hard to think of going forward. Not to mention, that when you eat something that tastes SO good, you just feel good too!


How to Stockpile:

Now that you have a list of food that you keep on hand at all times, you can start shopping for these items. This can be very overwhelming and can be very expensive if you just jump in all at once, you can take the stress off of starting your food stockpile by breaking it down into sections – this helps allow you to shop for the best deal as well!

A basic breakdown of categories to help you build your food stockpile would be:

  • Canned veggies
  • Rice and Pasta
  • Canned fruit
  • Sauces
  • Canned meat

You can absolutely adjust this to whatever your preference or needs are. Once you have the categories you can shop the sales!

There are four ways to get the most for your dollar when starting your food stockpile and maintaining it from there:

  1. Shop sales! Seriously, get to know your local variety of grocery stores and their weekly ads! You can generally figure out the rotation of when they will have different categories on sale, it is usually a six-week rotation. The items that are advertised in the weekly ads are “loss leaders,” which are to get you in the store to buy other items while you are there. If you have a very strict budget STICK to your list and just pick up the items of the ad for your stockpile.
  2. Coupons! Coupons are so much more than just the clip from the newspaper kind these days. While those are great, most stores have their own apps these days loaded with virtual savings. You can stack these with paper coupons as well if you get the chance. Coupon apps are great to watch before and after holidays especially. A couple of days after Easter I was able to score hams for $1 per pound thanks to Target’s Cartwheel app, and now we have those saved in the freezer.
  3. Another great place to catch deals for your stockpile is the store’s grocery clearance and less than perfect product section. Many stores will mark down items for at least 30% when the packaging is damaged. This can add up to great savings for you. Just check over the product and make sure that you are comfortable with eating the food inside the packaging. An example of this is that not everyone is comfortable with dented cans, they don’t bother me so I ended up with a 6pack at .25 cents a can! You can also get steep discounts when a store is discontinuing a product so make sure to check for clearance!
  4. Last but not least is the good old dollar store! They are a great place to pick up canned food as well as pasta, rice, and other longterm storage foods!


Specialty Items

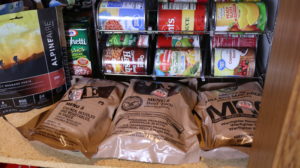
The last thing to touch on when talking about starting a food stockpile is specialty items. Specialty items are your Mountain House, Backpacker’s Pantry and other freeze-dried meals as well as options like MREs. These tend to be spendier options than your average food. I like to just keep a few of our favorite varieties on hand for every once in a while.  By making them a supplement to your food stockpile and not the bulk of it, it allows you to watch for sales and again clearance at sporting good stores and online retailers, making them much more affordable. For MREs I watch for deals on Amazon. I do this for freeze-dried meals as well, but I also look in brick and mortar stores for clearance when a new season is coming and the camping gear is resetting, making them much more budget friendly.

These are my tips to help you with starting a food stockpile, I hope they helped you out! Make sure you share any tips you have for starting and maintaining a food stockpile in the comment section below. I love to hear from you!


how to start a food stockpile


google.com, pub-7066259607393589, DIRECT, f08c47fec0942fa0